Installing The Theme and Plugins Required
Last updated
Last updated
HERE IS OUR VIDEO TUTORIAL TO HELP YOU THROUGH THE PROCESS:
Once you have set up a copy of WordPress, there are two ways you can use to install the theme:
Log in to your web server with FTP client software.
Unzip the downloaded theme file.
Upload the wiseguard theme folder into /wp-content/themes.
Navigate to the Appearance > Themes tab and activate the theme.
Log in to your WordPress site.
Navigate to Appearance > Themes and click on Add New > Upload Theme.
Select the wiseguard.zip file and click Install Now button.
After the successful installation, click on Activate to activate the installed theme.
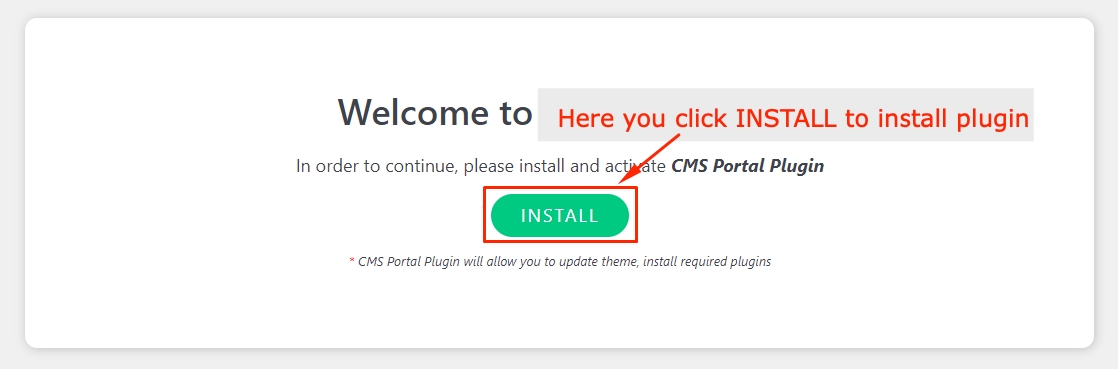
Install and activate the CMS Portal plugin.
Recommend: You should install the Child theme If you want to make changes to the theme's files and functions. Because the Main theme will be updated regularly. This ensures that your theme customizations stay in place after the theme update. If you are not planning to change the core theme files, you are free to skip this section.
A Child theme is installed the same way you install a parent theme. Via FPT upload or WordPress upload.
7. After Installing CMS Portal Plugin and Child Theme, please click Install & Active button to Install and Activate all required plugins before installing Demo data.
Now you are completed.
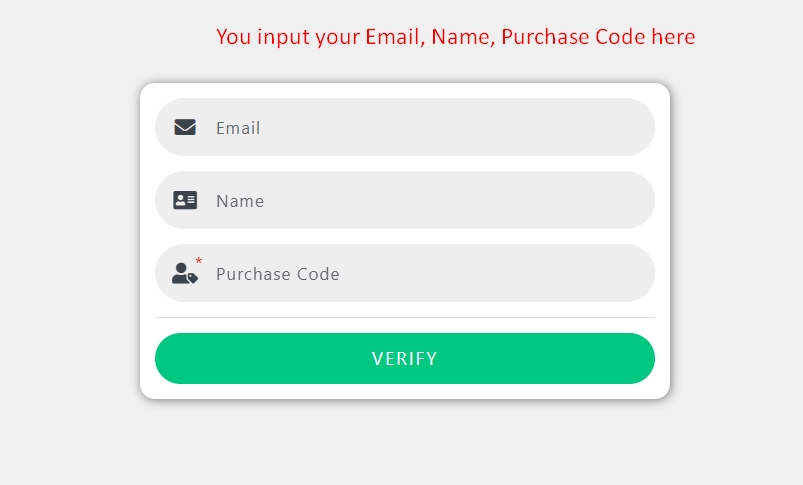
6. Enter your Purchase Code and your Email, Name. Note: To get the purchase code, please navigate to your ThemeForest "Downloads" page and click on the theme download link. Check this for more details.